Creating Grants
You’re most likely using GO Smart to build, administer and manage an application – and you can do that in a flash! But did you know you can also use GO Smart to offer all of the forms of your grant cycle including an intent to apply, interim report, and final report? Whether your grant includes any or all of these forms, use our Grant Editor to easily craft each element of the grant cycle.
For the most basic cycle, you will add your desired application pages, choosing from our customizable or templated options. Next you will craft the questions, content and settings of each page. Use the Program Cycle editor to determine the settings and logistics of your application and cycle as a whole. Finally, create optional auto-confirmation emails that the system will send to applicants as they move through the application work flow.
BUILDING YOUR APPLICATION
Whether your application cycle includes one basic form to gather applicant data, or you use additional forms to gather preliminary or post-award data, the application form is likely the most important part of your grant cycle. GO Smart makes it easy to craft the pages, questions, tables, and templates to ask your applicants for the important data you need to make your award decisions. Use any of our 9 page types that allow for customization of 14 question types, 5 budget options, dynamic media requests, and even Arts Endowment-specific templates to ensure that your application is intuitively designed and visually pleasing.
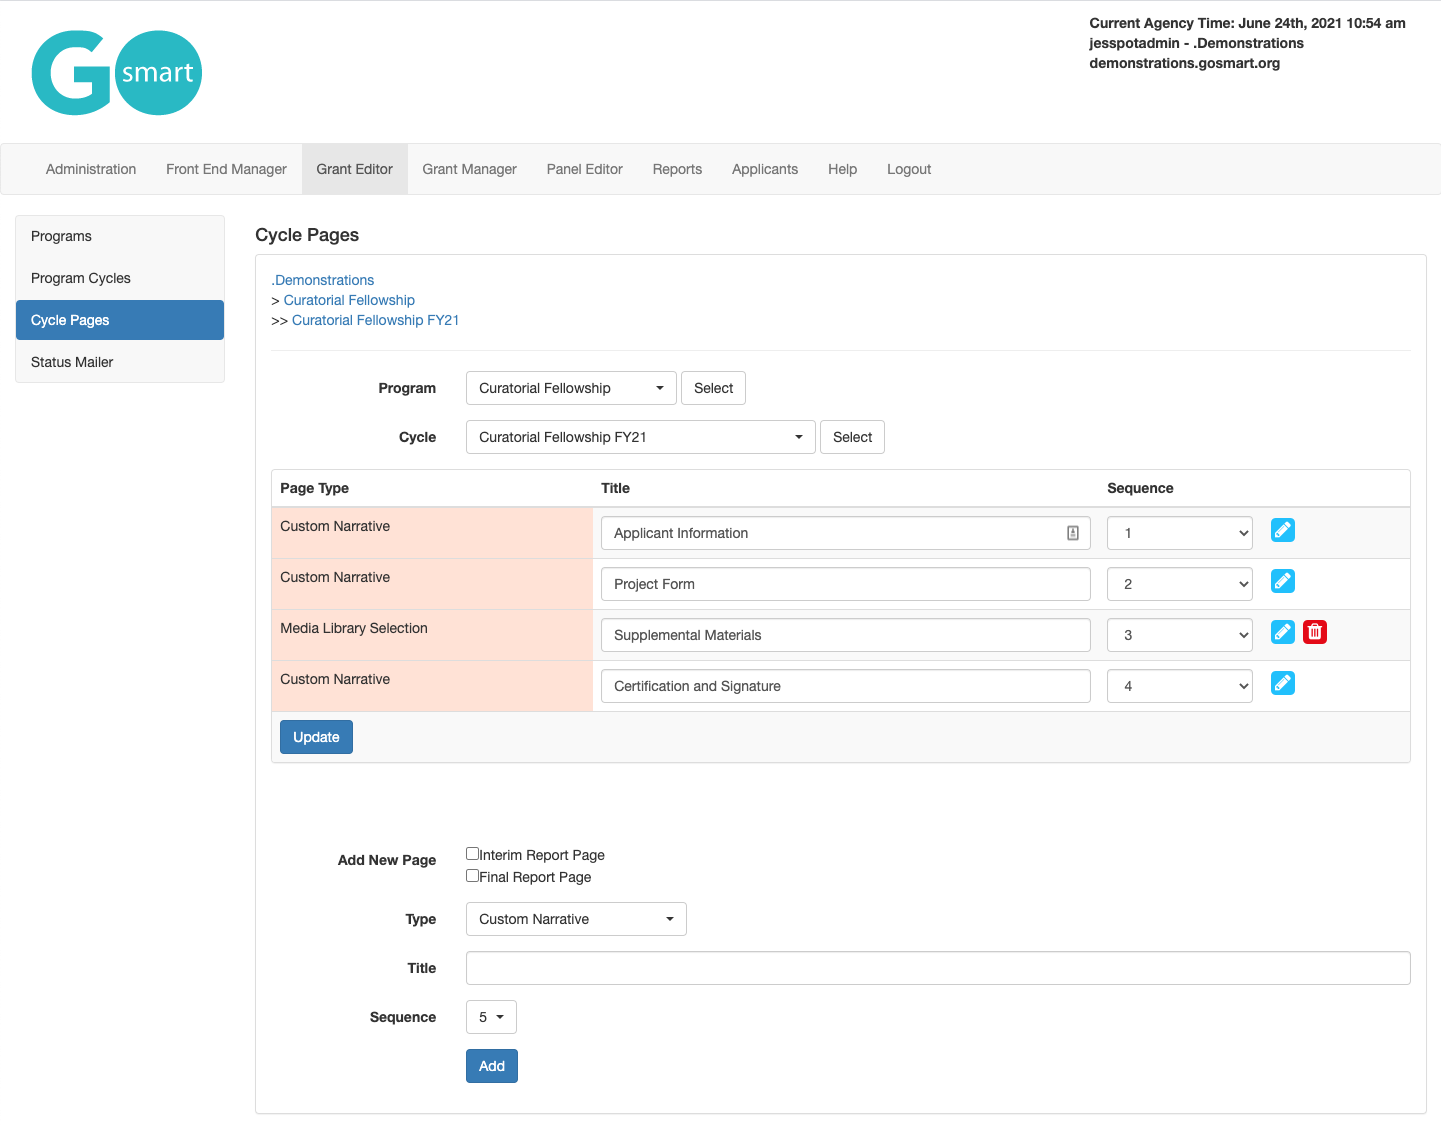
Give your pages custom names.
Select your page type (Custom Narrative, Custom Table, Media Library Selection, etc.) and add it to your application (or other forms of the cycle).
Change the order of pages if a better workflow is determined after building.
Edit the contents of each page, or remove a page that is no longer necessary.
Add unlimited pages to your application and manage them from this easy-to-read table.
DESIGNING EACH PAGE
Once you have added your pages to your application, you will craft the contents and design of each page. Custom narrative pages, like the one shown below, allow you to utilize 14 question types in unlimited ways to ask for the data you need.
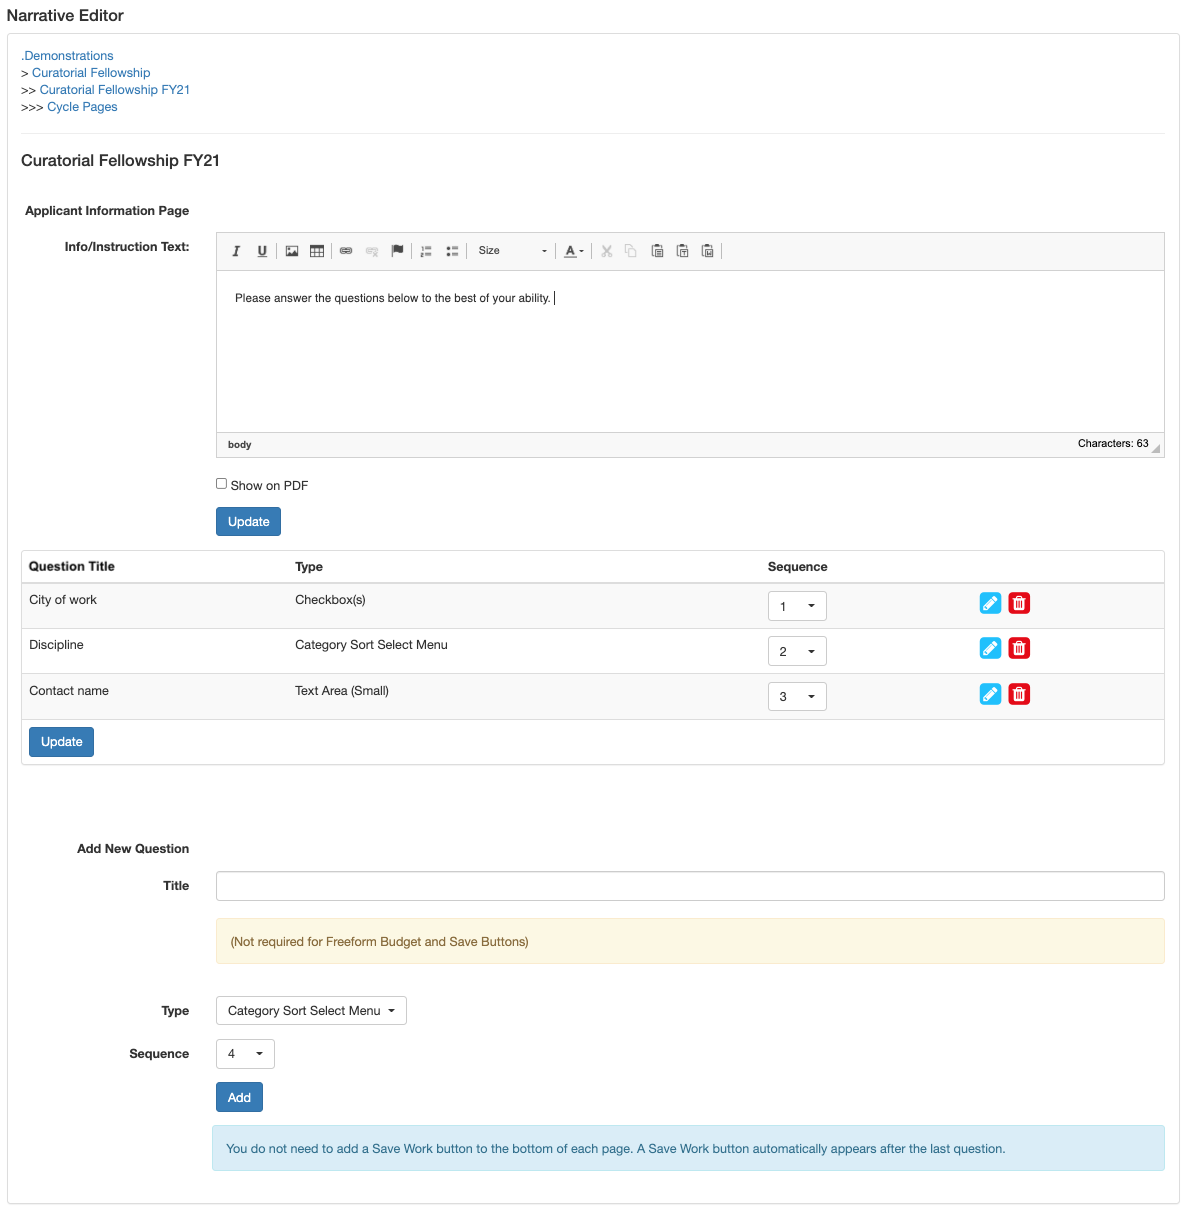
Add optional custom Info/Instruction text to the top of any page to help guide your applicants through the application.
Add unlimited questions to a page (or multiple pages with fewer questions if desired) and manage them from this easy-to-read table.
Select your question type (checkbox, text field, radio button, etc.) and add it to your page.
Change the order of questions if a better workflow is determined after building.
Edit the contents and settings of each question, or remove a question that is no longer necessary.
DETERMINE THE CYCLE SETTINGS
Determine the logistics and settings of you grant cycle from the cycle editor. Use this space to, among other things, give the cycle a name, set dates and deadlines, and craft additional text that will inform your applicants about the grant.
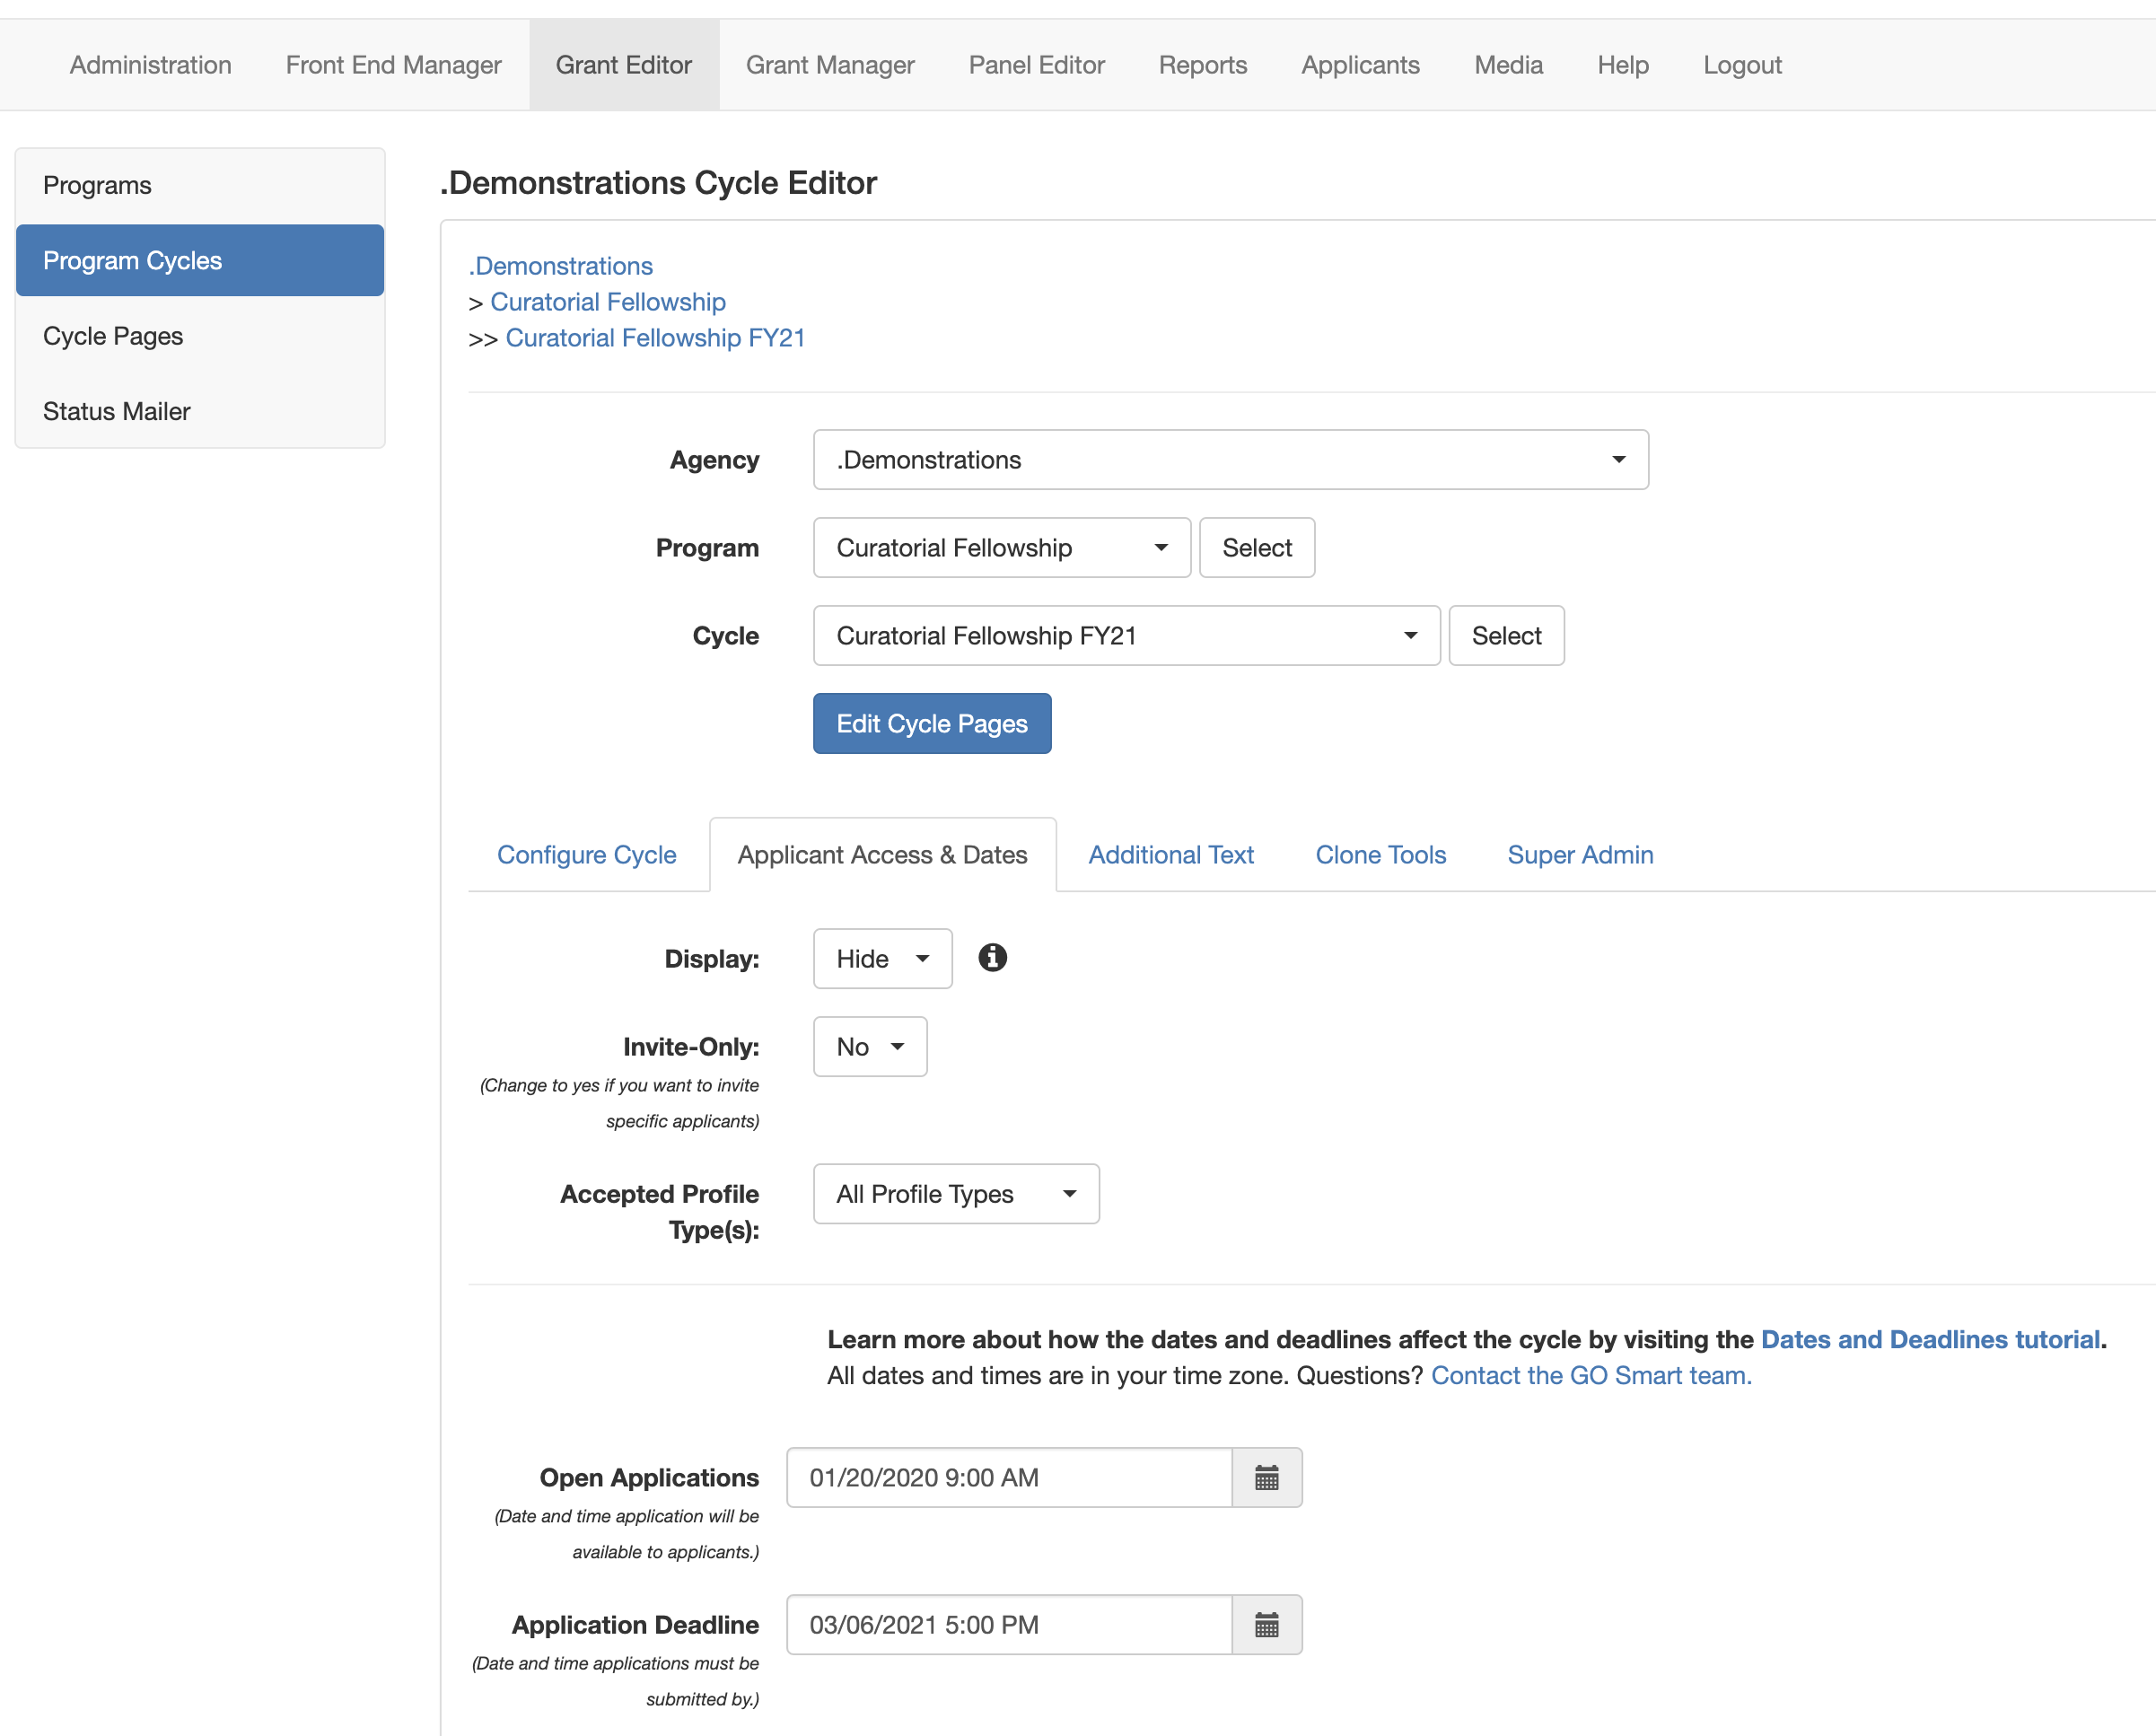
Determine the cycle name, the application # prefix, and similar settings from the Configure Cycle tab.
Craft additional text that is not part of the application content, such as a Program Description that can inform applicants if the grant opportunity is right for them.
Determine who has access to elements of the cycle and when by selecting the status, allowed profile type, appropriate open and close dates for the application and other forms of the grant cycle.
Use the clone tools to easily copy all content from a previous cycle and be ready for the next grant cycle without rebuilding a thing.
CREATE AUTO-CONFIRMATION EMAILS
Set your applicants up for even greater success by creating optional auto-confirmation emails that will further guide them through the application process – and potentially stop questions before they’re even asked. Use our Status Mailer tool to create emails that the system will send as soon as the selected status is met (i.e. In Progress status sent when applicants begin an application, Received status sent when an applicant submits an application, etc.).
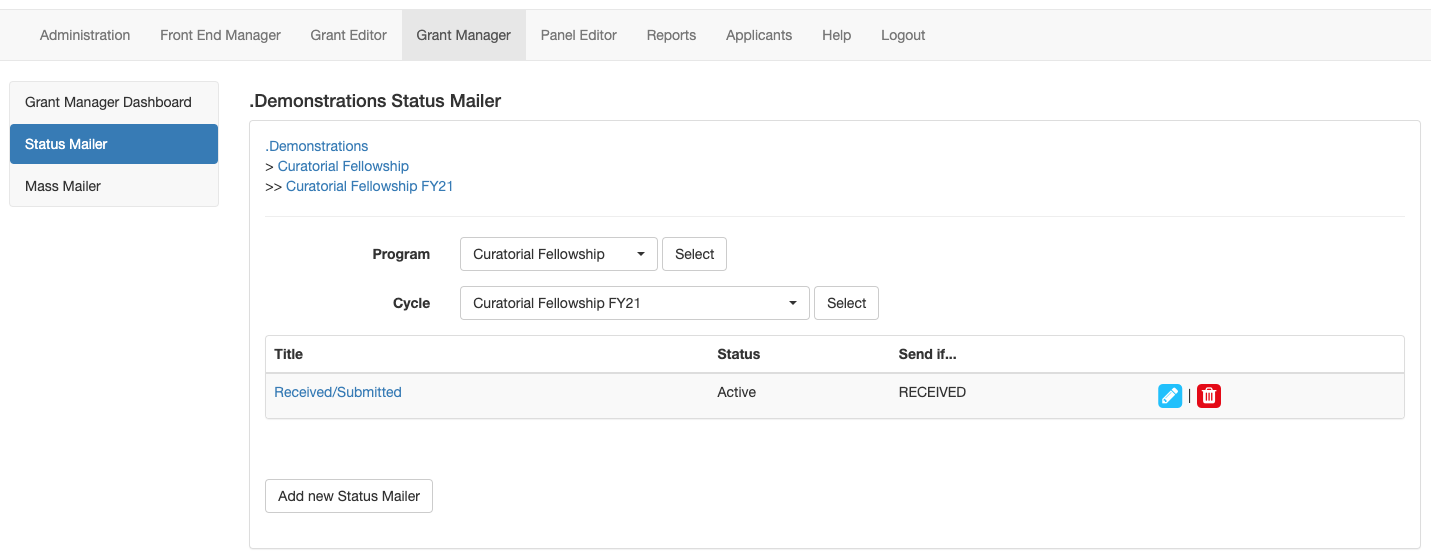
Give your status mailers custom names, visible only to you.
Select the status that will set off the email to be sent to the applicant.
Edit the contents and settings of your status mailer email, or remove status mailers that are no longer necessary. You could opt instead to disable a status mailer so that it can be used year after year but is only sent out when set to Active.