After you have designed the basic aesthetics, settings, and language of your applicant site from your Front End Manager, you’re ready to build your first Grant Program. Grant Programs in GO Smart are made up of Programs, Program Cycles, Forms, Cycle Pages, Questions, and Settings.
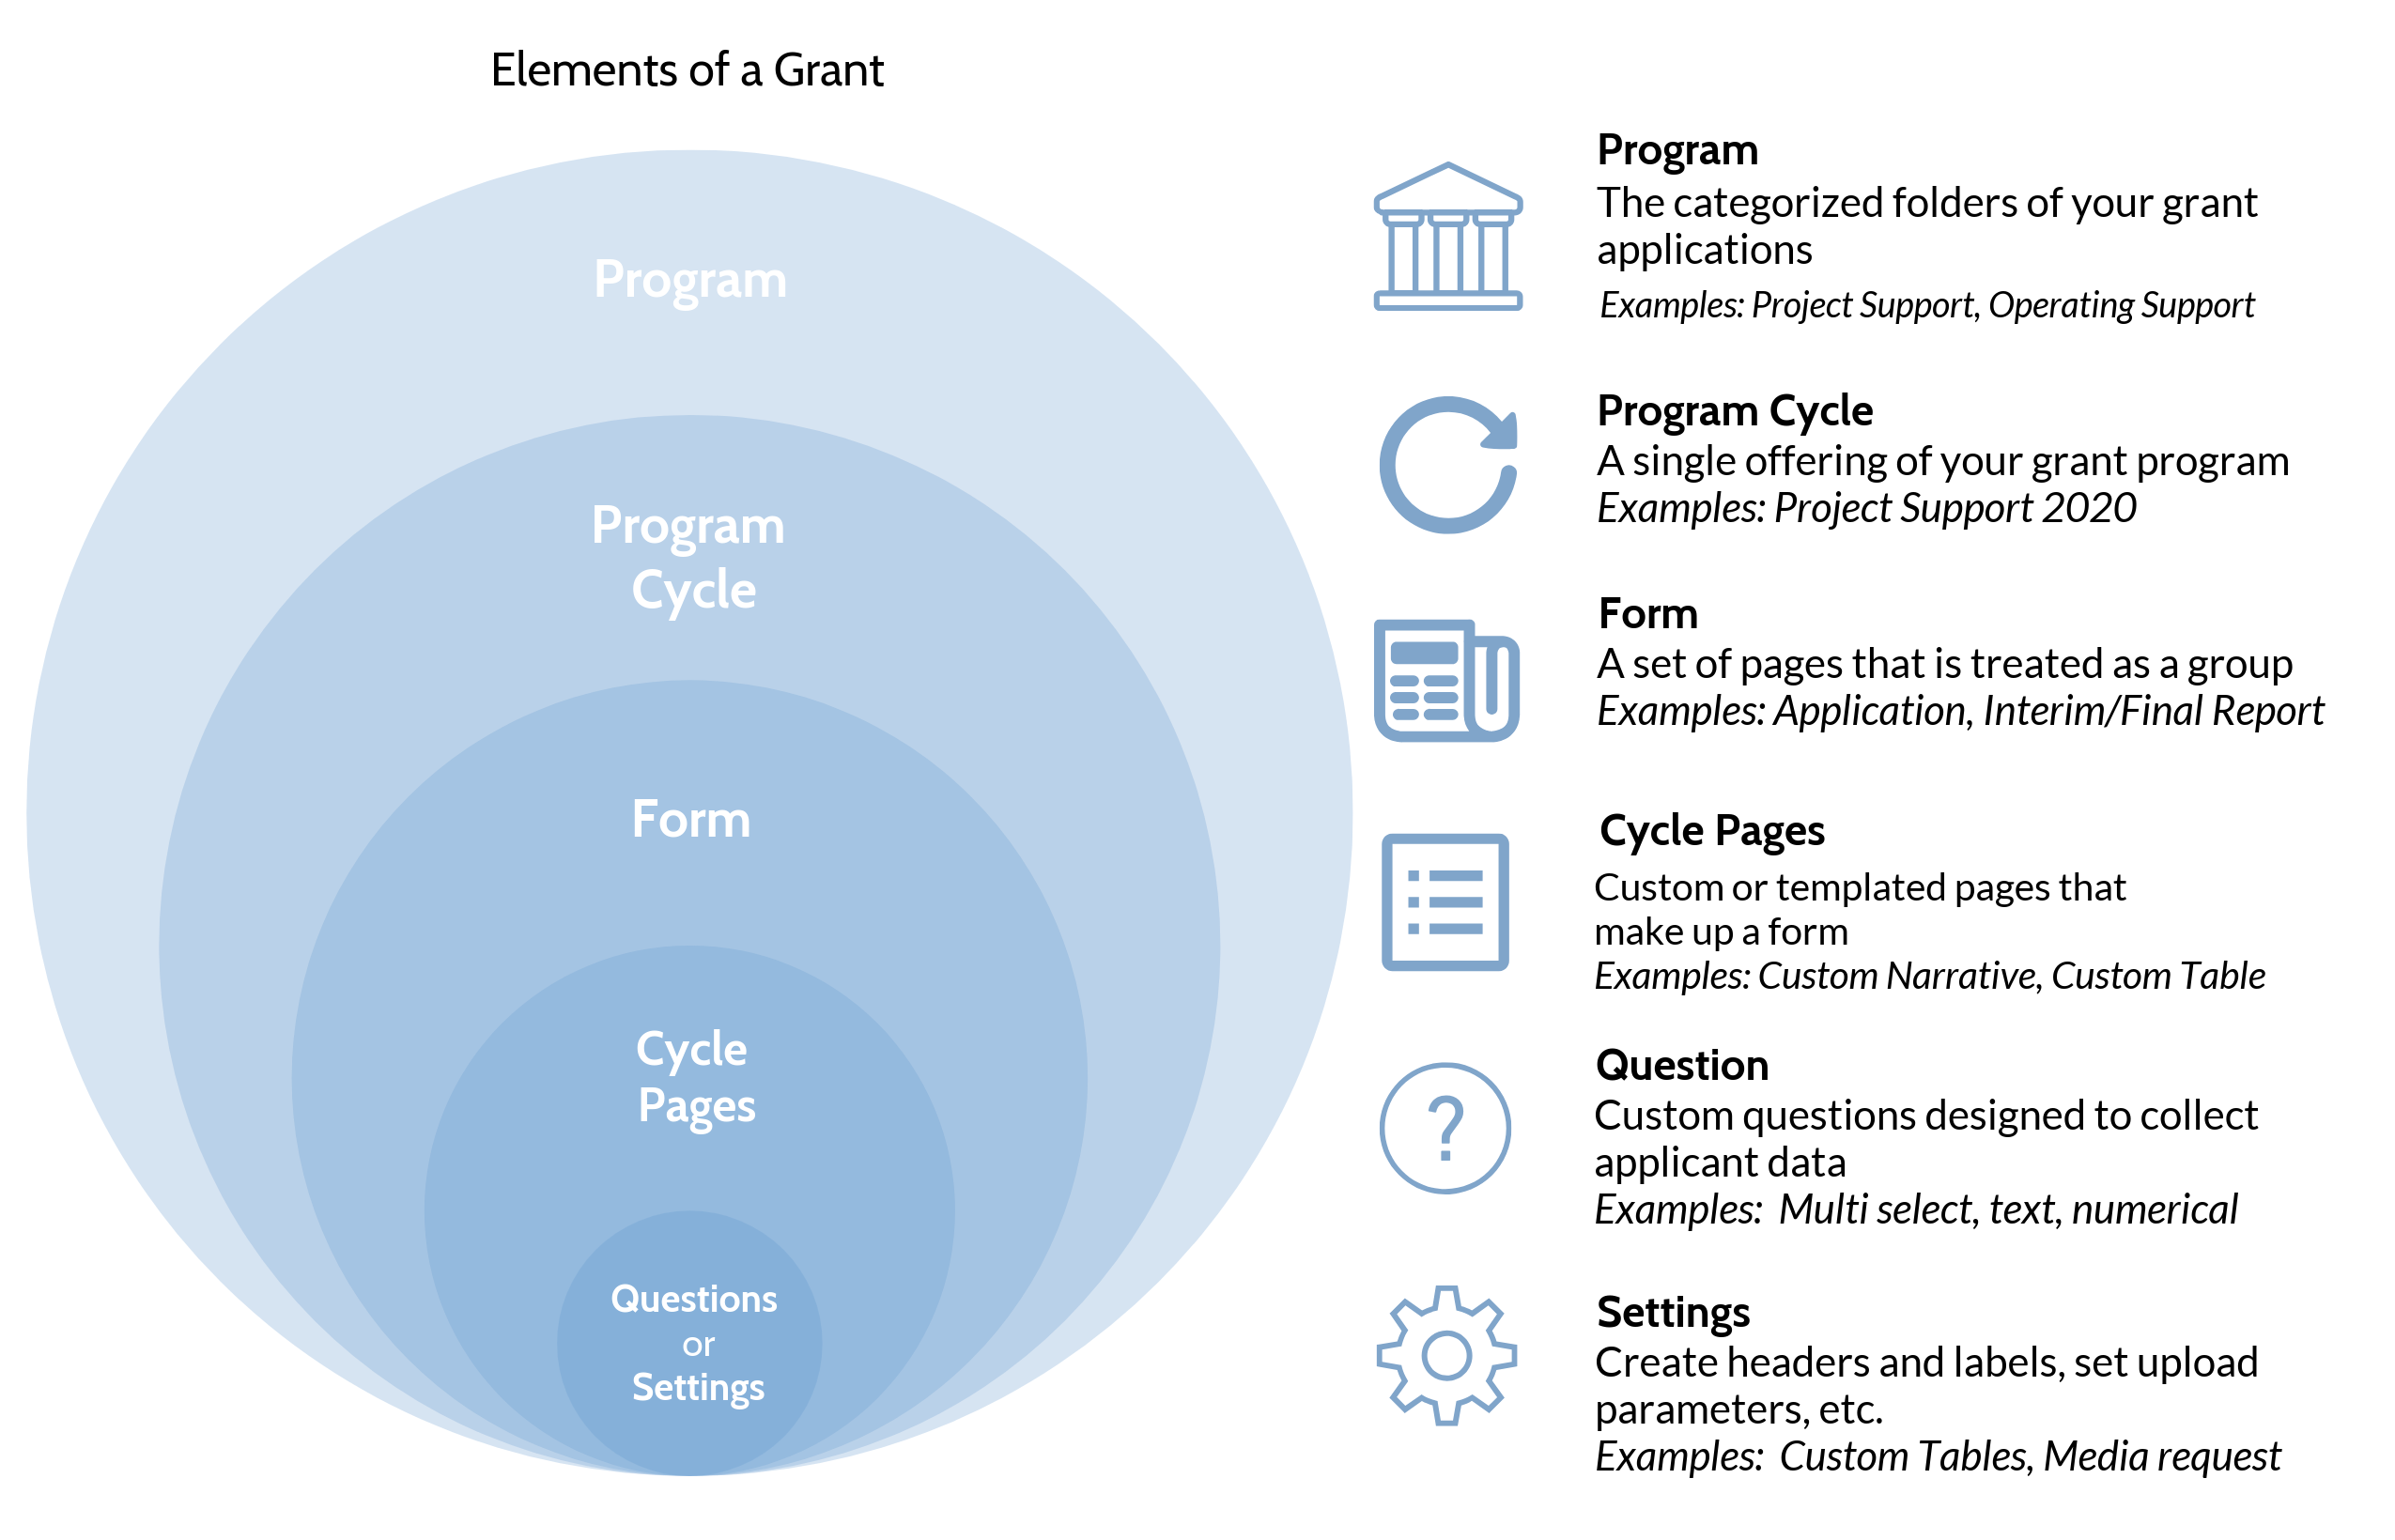
Programs – one grant opportunity that is offered cyclically. In GO Smart, your programs act as the main folder for your cycles and associated forms. For instance, you might create programs with names like “Community Support” or “Operating Support” (as shown in the example of the admin site shown below). These names will not be visible to your applicants.
Program Cycles (aka cycles) – one complete offering of a single grant opportunity from Application and Paneling to Awarding and Reporting. The standard GO Smart cycle workflow is: Intent to Apply -> Application -> Interim Report -> Final Report. A cycle will appear on your applicant’s Grant Applications & Forms page as one single opportunity with up to these four forms available at different times in the process, as shown in the example below.Program Cycles should have the name of the program, plus the time frame. So your program might have a name like Community Support and your cycles might have names like “Community Support 2023,” “Community Support 2024,” and so on.
Your grant opportunities may also include additional forms, for example, invoices and reimbursements. These forms might be given names such as “Community Support 2023 Reimbursement” or “Community Support 2023 Invoice.” These additional forms are called “flexible forms” and will be created as separate cycles on your applicant site.
Forms – (aka page sets) the GO Smart system treats a single page or groups of pages in your cycle as a color-coded form (as shown below in the example from the admin site). For instance, every page that is added to the peach colored application will be available to applicants at the same time; the pages of the optional yellow interim report will be available as a set after the applicant has been funded; and the pages of the optional green final report will be available after the applicant’s interim report is approved (or after the applicant is funded, if there is no interim report). Optional Intents to Apply will appear on your page table in purple. Forms can also be flexible, and you will build these alternative forms (i.e. reimbursement forms, invoices, etc.) as peach application page sets of a new cycle within the same program.
Cycle Pages (aka Pages) – each page set is made up of a single page or a set of pages. Consider the construction of your application, interim report, and/or final report and build more than one page if questions should be separated by theme or idea. Use separate pages for tables and support material uploads. Intents to Apply are a single page that will be treated as a separate form.
Questions – each page will be used to collect information from your applicants OR offer information and guidance on how to apply. Questions must be added to Custom Narrative or Custom Calculation page before applicants can provide data on that page.
Settings – some pages require only settings rather than questions. For example, Custom Tables begin with a ready-made form and admin need only enter their column headers and row labels for the system to generate the table. Likewise, the Media Library Selections page houses a table to which admin add their media parameters for number and size of file types then the system generates the page for the applicants to attach their media. Lastly some pages are templates and as such, admin will not need to create text to make the pages valuable to applicants, but informational text can be added to the top of these (and any) pages. Learn about the settings required on certain pages by reviewing the Page Types tutorial.