Make your GO Smart data work for you behind the scenes with your new API key! We recommend using Zapier, a cloud-based API, to connect your GO smart data to thousands of other programs.
With this tutorial, you will create a zap that will generate an internal email whenever an application is submitted. We will use a gmail account, but you can swap in a different email or message service (like Slack or Outlook) to follow along with these directions.
Because GO Smart allows you to create a Status Mailer when an application is submitted and allows you as the admin to be copied on it, a zap like this might only be desirable if you want to receive the notice without sending your applicants a status mailer. You can also set up a similar internal email when an applicant registers or updates their profile, if that would be more useful.
Take a second to learn some of the basic Zapier terminology before you jump in.
1. Navigate to Zapier and sign up or login with your zapier credentials.
2. Click the orange Make a Zap button in the top right corner of the screen.
 TRIGGER STEPS
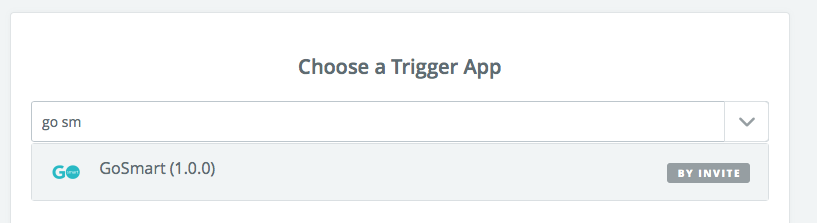
3. Choose your trigger app by typing GO Smart into the search field and click it
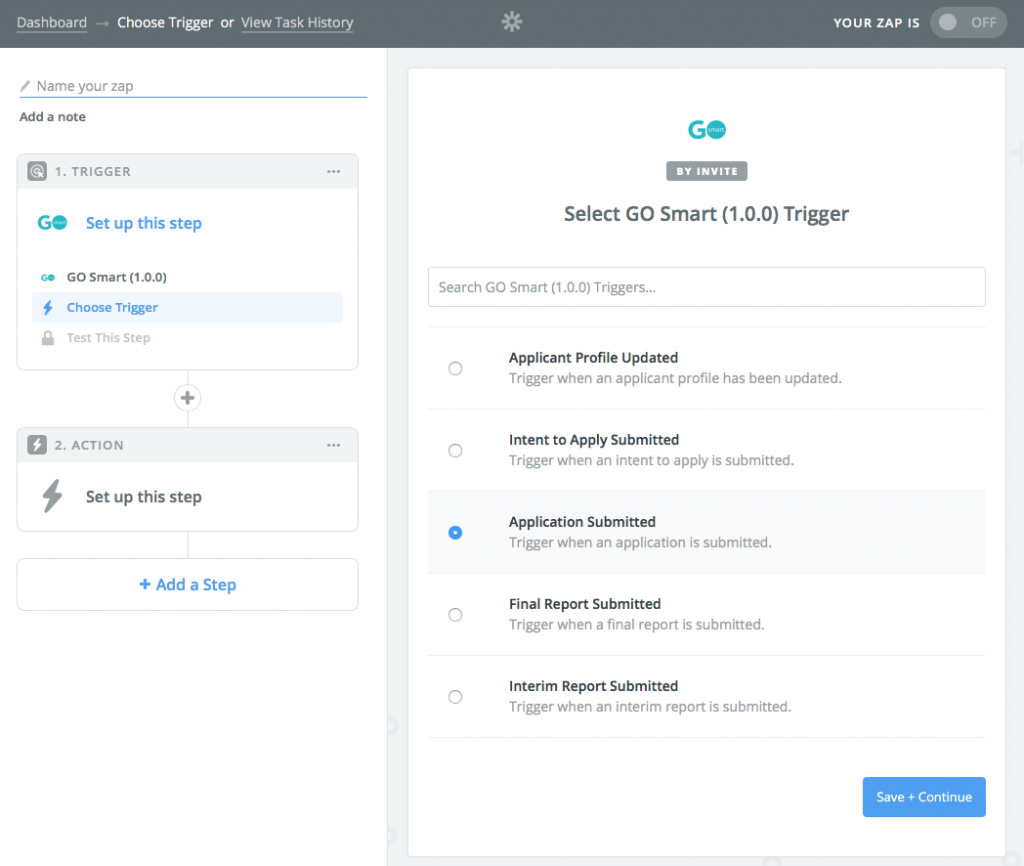
 4. Choose your trigger by selecting “Application Submitted” from the list of available options and click Save + Continue
 5. Select your GO Smart agency site from the connected accounts and click Save + Continue
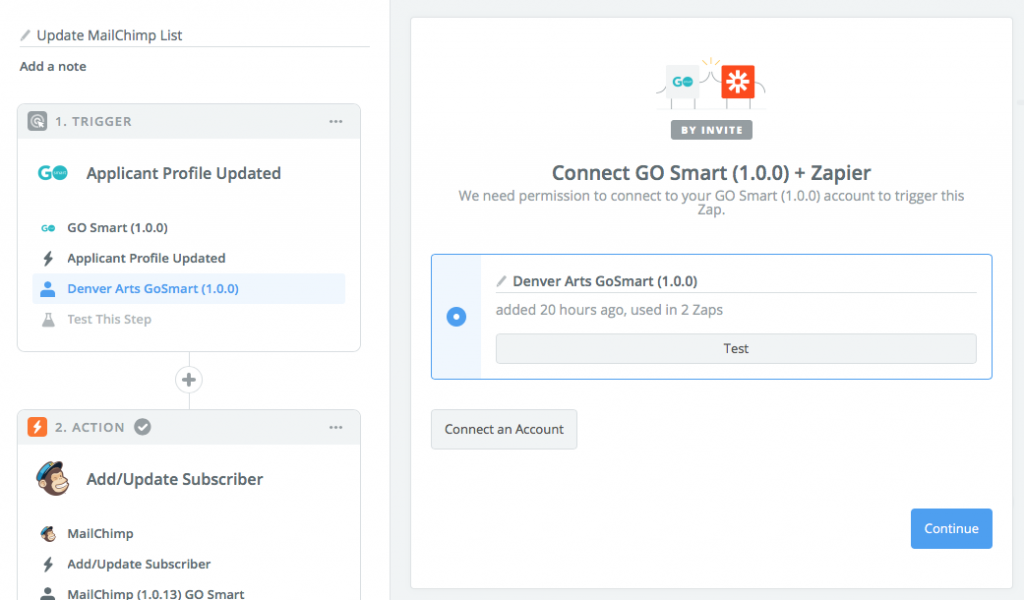
- If you have not yet connected your GO Smart agency site, follow this tutorial.
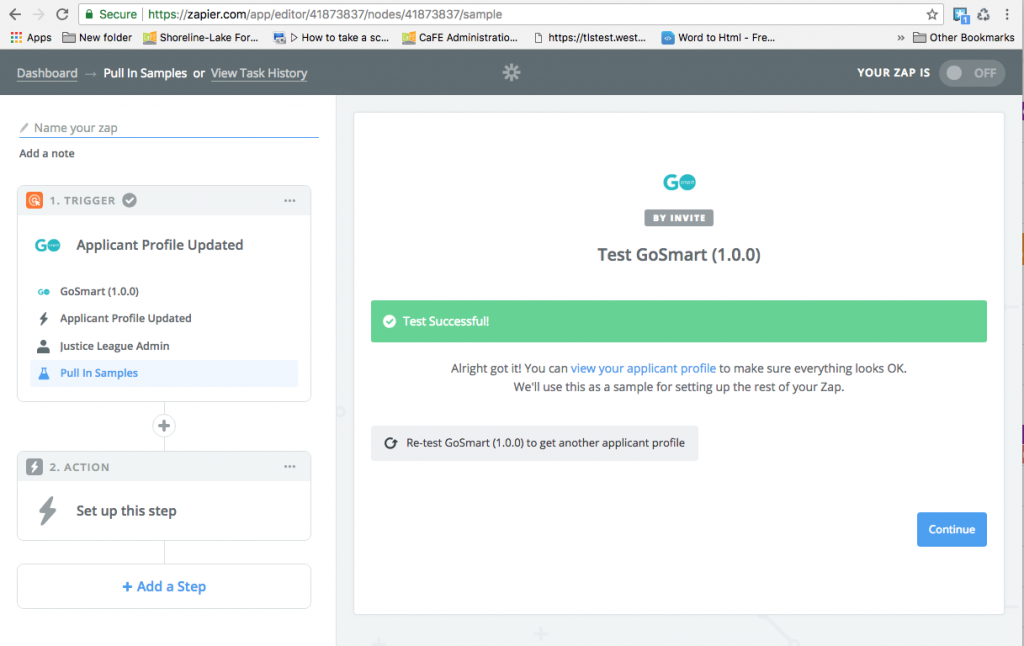
6. Test your step. You may see a Hints section that will walk you through setting up some sample data. Click through the hints or click Continue. Complete your test by clicking the Fetch & Continue button.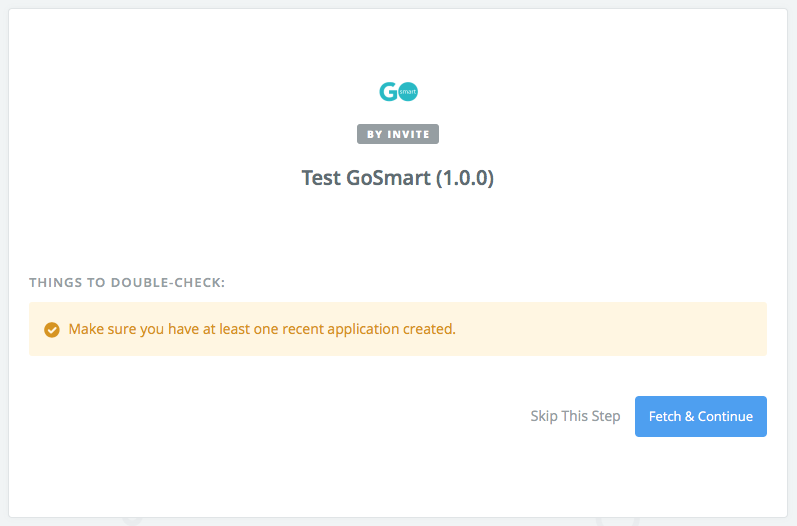
- You may need to first register one test user at your GO Smart applicant portal.
7. If your test was successful, click Continue
- If it was not successful, check to make sure your API key is still accurate, you may need to regenerate and re-enter the key in the Connected Accounts step
ACTION STEPS
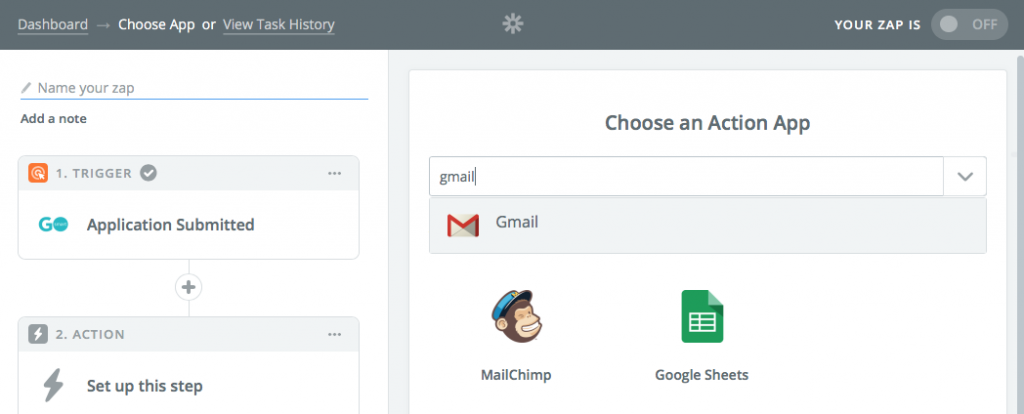
8. Choose your action app by searching for Gmail and clicking on it.
 9. Select your action by clicking on “Send Email” and click Save + Continue.
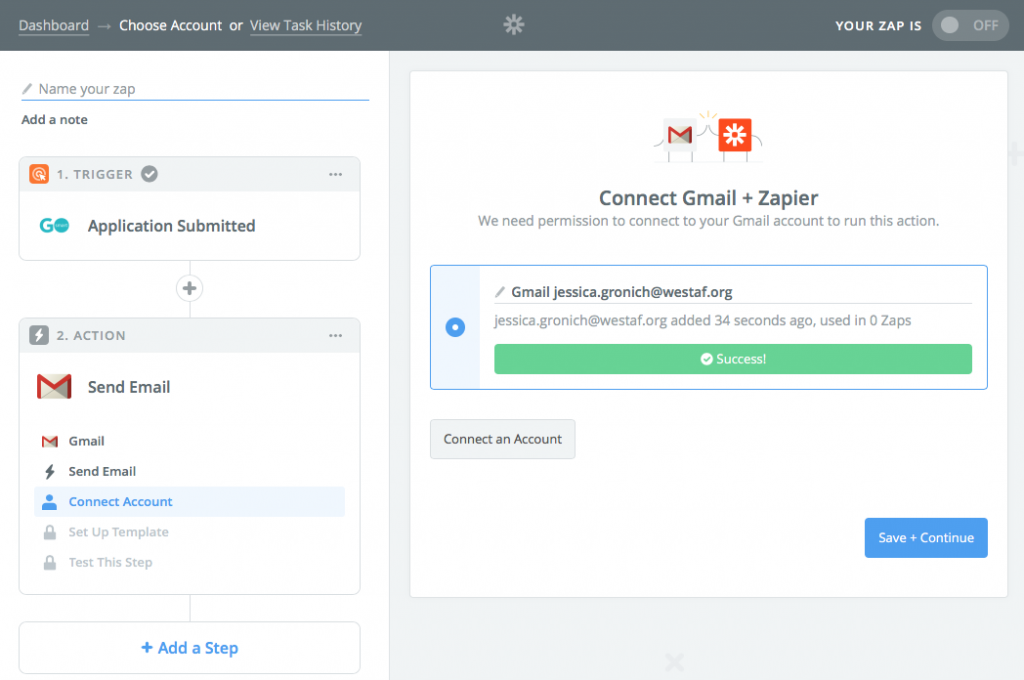
 10. Connect your gmail account to Zapier by clicking Connect and entering your gmail credentials when prompted. Again, if you do not use gmail, swap it out in these instructions for the email service provider you use. Test the connection by clicking Test. If successful, click Save + Continue.
 11. Set up the template by selecting the items you want to populate in your email. You’ll see the items listed below.
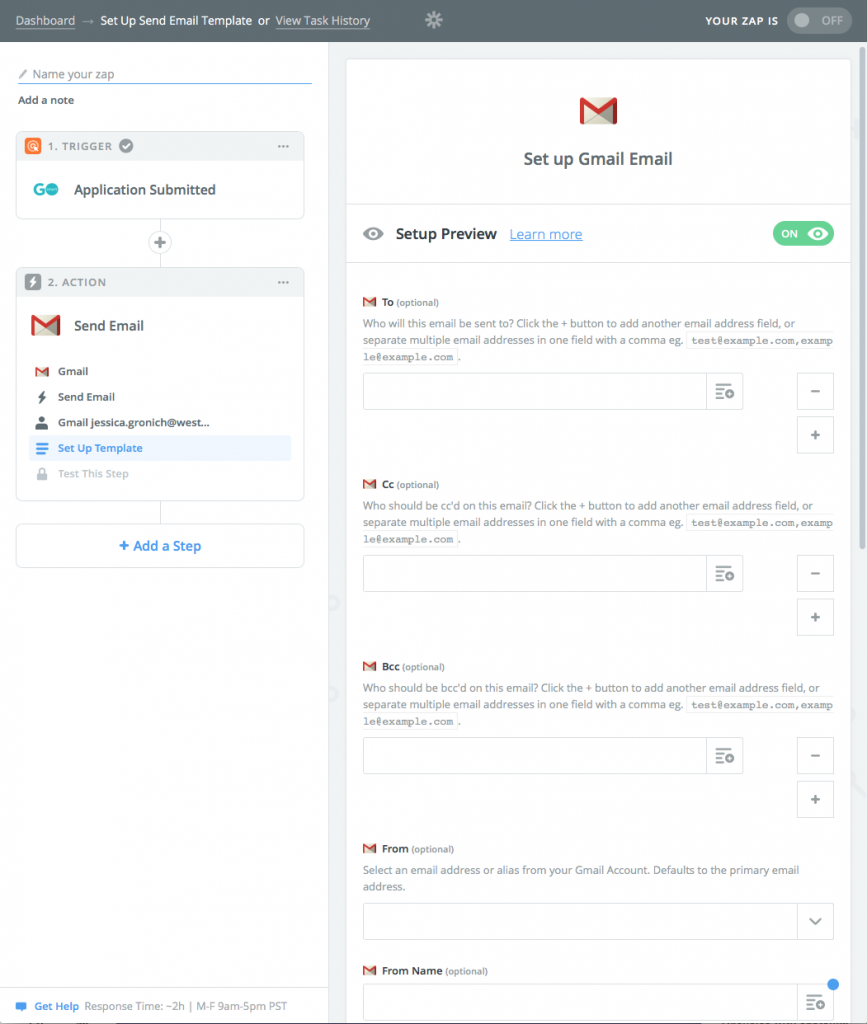
- To – type your recipient for this email (we entered our email address)
- Cc – type any desired copied recipients for this email (we left it blank)
- Bcc -type any desired blind copied recipients for this email (we left it blank)
- From –type your sender for this email (we entered a separate email address for ourselves)
- From Name – type your sender’s name (we entered a separate email address for ourselves)
- Reply to – we left this blank
- Subject – type your desired subject header (we typed “New Application”)
- Body Type – select Plain or HTML, we selected plain since this is internal
- Body – type your email language.
- Note that you can mix your own language with the fields that are available by clicking the menu icon in the upper right corner of the field.
- Headers within this section will be followed by an example of one of your applicants in light gray OR the word null if your sample/test user didn’t fill in each section. This is fine. If your tester’s Email section reads null, you can still select that field.
- Because we selected “Application Submitted” as our trigger, the media fields are the end points available to us. If we had selected “Profile Updated” the profile information would be available to us.
- Label/Mailbox – select a label to associate with this (we left this blank)
- Attachments – select an item to be attached from the list of available fields. Again, because we have the media available to us, we can select any or all of the attached media. We selected the following 2 items and separated them by commas to receive any media attached to the submitted application. This will include any images and any media uploaded via a File Upload field.
- Samples Websized URL
- Uploads Download URL
12. Test this step by clicking Continue after completing your settings and then click the “Send Test to Gmail” button.
- Navigate to your gmail account and verify that you can see your test email was received.
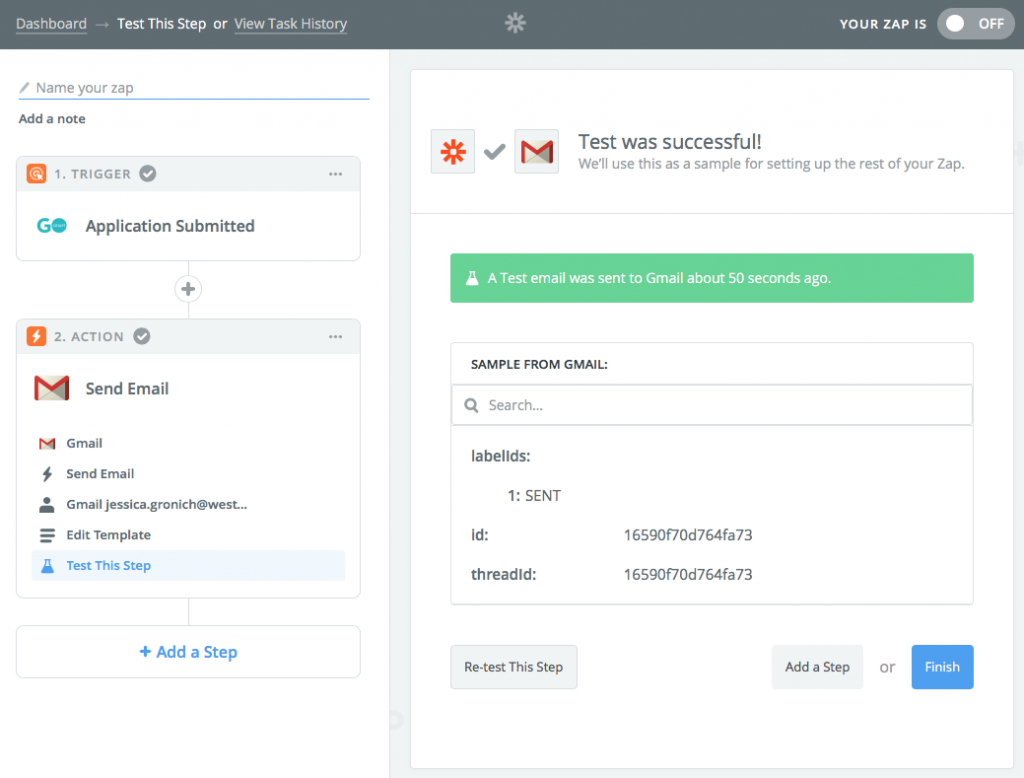
13. If all was successful, go back to your Zapier setup and click the “Finish” button
 14. Name your zap, we called ours “Send Gmail for Submitted Apps”, and turn it ON
- Once your zap is on, it will sweep you GO Smart site every 15 minutes (at the free subscription level) and anytime an application is submitted, the email will be sent to your designated recipient. Now sit back and wait for the magic to happen!
**Remember that this is only proactive with NEW triggers and actions. All of your previously-submitted applications will NOT create an automatic email.
See this tutorial without images here!
One Response